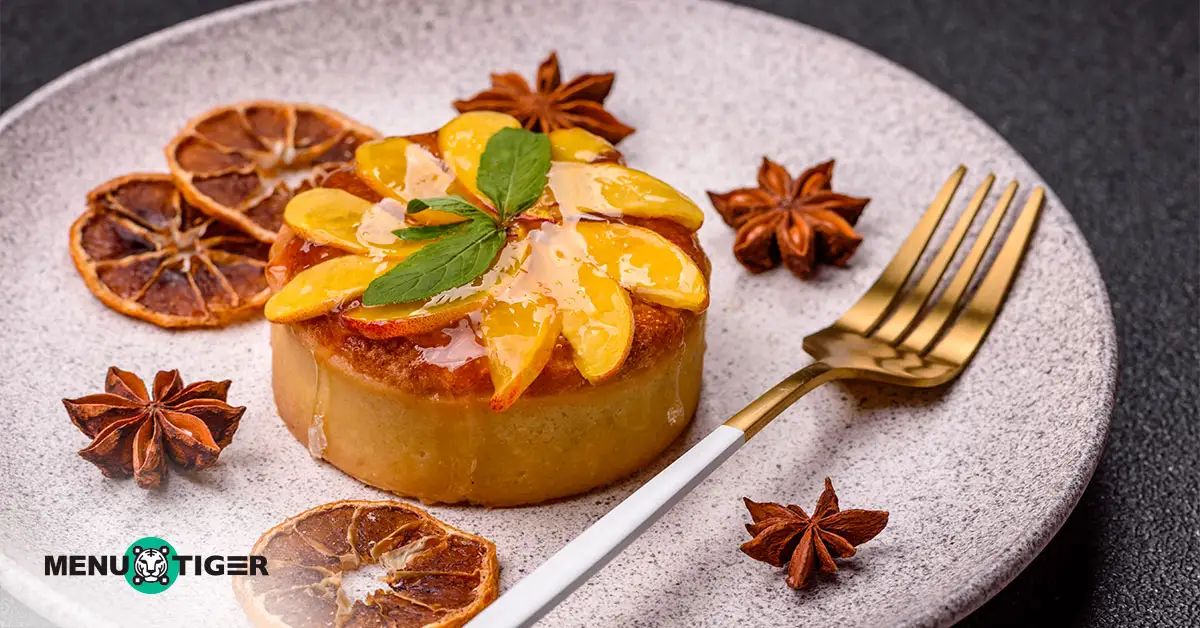
You nailed the flavor. The seasoning? Spot on. The cooking? Chef’s kiss. But without the right food plating techniques, that culinary masterpiece loses its spark the moment it hits the plate.
That’s the thing about food plating. You can spend hours building the perfect flavor profile, but if the plate doesn’t make people pause and stare, that magic moment disappears in seconds.
And let’s be real: today’s diners don’t just eat. They snap, post, and tag. One quick photo can make your dish go viral or vanish into the digital abyss.
So here’s the real question: Are you planning to tell a story, or just fill space?
In this guide, we’ll break down the essential plating techniques every cook (yes, even home cooks) should know, and how restaurant order management quietly plays a part behind the scenes.
Table of Contents
ToggleThe 5 food plating basics you need to master
Before you get fancy with deconstructed layouts or minimalist flair, you need to nail the basics of this food trend for your restaurant.
1. The plate: Your blank canvas
Seriously, your plate is the foundation. It’s like the canvas for your masterpiece. Choosing the right one takes a bit of thought because it’s going to define the entire look, so keep these points in mind:
- Size
We’ve all seen tons of different plate sizes, right? While the size definitely depends on the dish, the real trick is to always go a little bigger than you think you need.
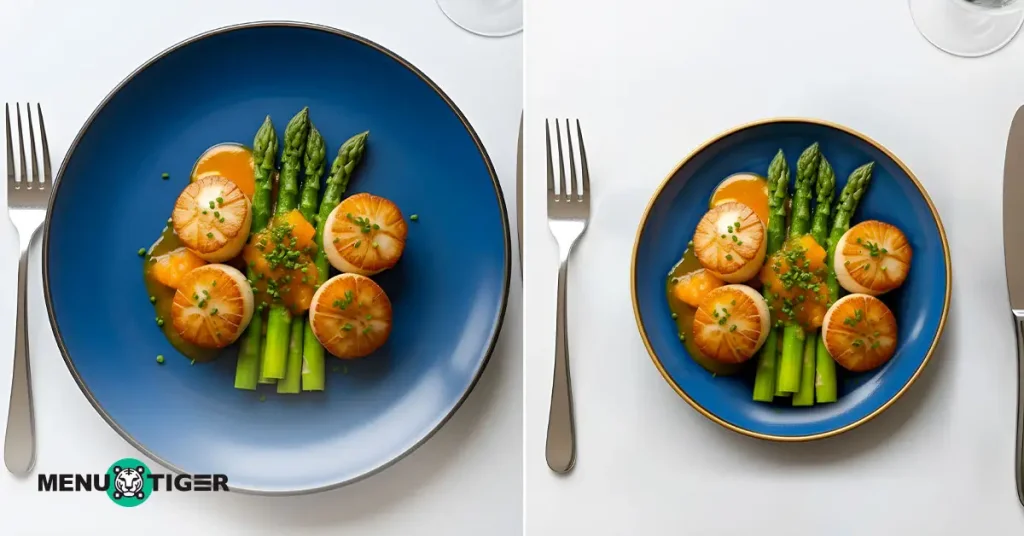
Notice how plate size contributes to the idea of a dish being expensive and fancy. A smaller plate can make all your elements look crammed together.
But if you use a bigger one, you use that space (we call it negative space) really effectively. The result is a presentation that looks way cleaner and more refined, ready for food advertisements look.
- Color
People always argue about whether a black or a white plate is better, but honestly, it just depends on the food you’re serving. The main goal is to always maximize contrast so that your food practically leaps off the plate and looks its most delicious.
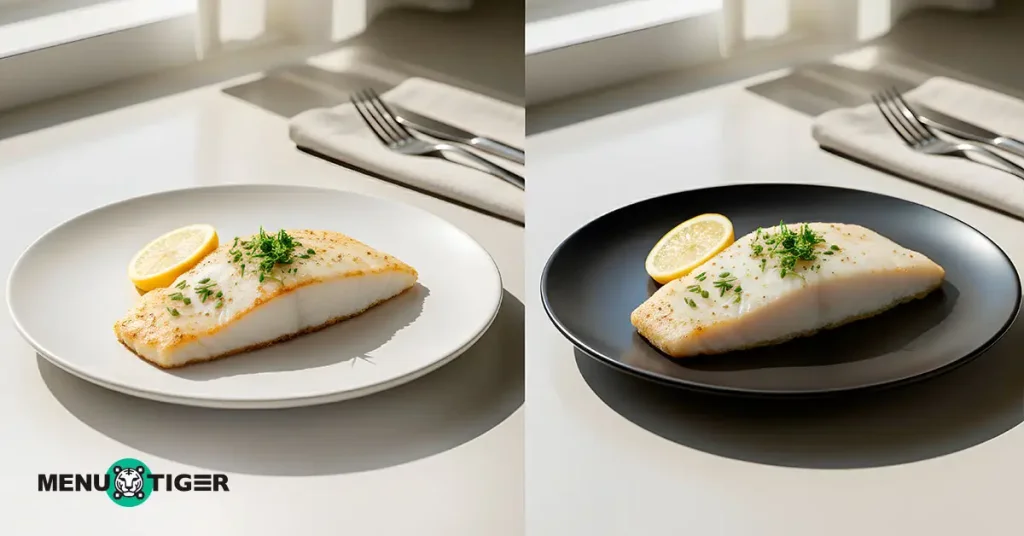
If your goal is elegance and subtlety, and the dish has textural or colorful garnishes, a white plate can work well.
If your goal is visual impact, contrast, and showcasing shape and cleanliness, a black plate is often the stronger choice for white or pale foods.
- Shape
While the classic round plate remains a timeless choice, exploring different plate shapes can dramatically alter the perception and dynamism of your dish.
If you are going to use:
○ Circle
It creates a harmonious and comforting feel. Round plates naturally encourage a central focus for the food.
○ Square
It lends a modern, architectural vibe and is ideal for structured, linear, or geometric food arrangements that play with sharp lines.
○ Rectangle
This is excellent for creating a sense of movement or progression, making them ideal for showcasing multiple small components, a line of sliced ingredients, or a progression of flavors.
The sauce: Your artistic signature
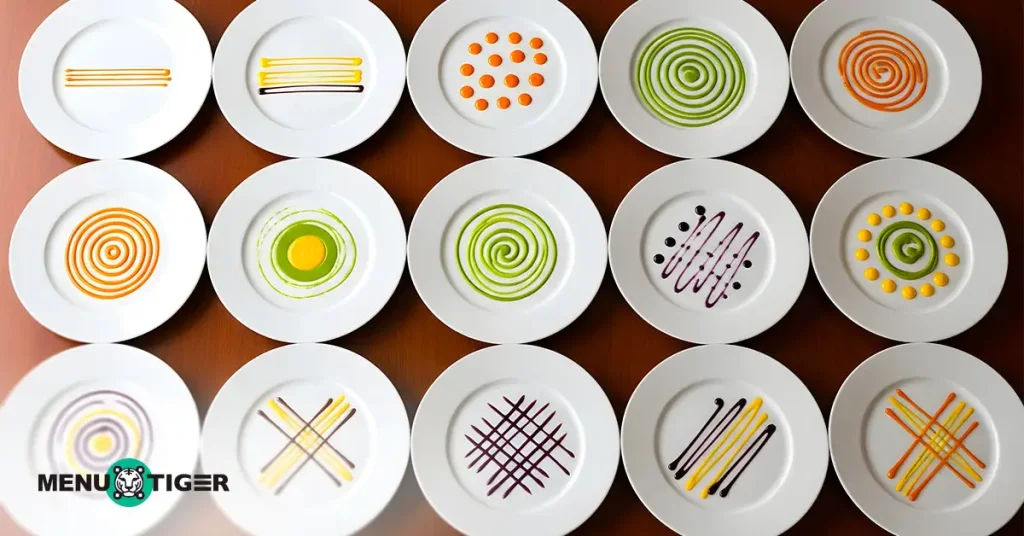
While the meat may be the main character on the plate, the sauce truly gives the whole dish life and creativity. This is seen in how it is designed and carefully curated.
When it comes to using sauce as a design element, chefs focus on two primary styles:
- Controlled design
This technique uses sauce precisely to create shape, definition, and a landing pad for the main components. It works best with thick, stable sauces.
○ Circular base
○ Grids or squares
○ Stripe or swirl
○ Dots or pools
○ Frames or borders
- Dynamic flow
This technique uses sauce to imply motion and break the symmetry, giving the plate a more abstract, artful, or energetic feel. It works well with thinner, more liquid sauces.
○ Sweeping brushstroke
○ Drizzled trails
○ Splattered drops
○ Curving swirls
○ Gradient wash
3. Visual plating: Where the eye travels
This is where you start asking questions like, “Where and how should I place this to make it look good?” The technique is about using balance, color, and space to guide the eye and make the dish feel just as good to look at as it is to eat.
- Odds quantities
Three is the magic number! Our eyes naturally find odd groups of things more interesting and dynamic than even, symmetrical groups. It makes the plate feel more intentional and less like a military lineup.
- Color varieties
Color contrast is the quickest way to stimulate the appetite. By placing intense, vibrant colors (like green, red, or yellow) against neutral backgrounds (like brown or white), you create visual tension.
- Balance (the leaning tower)
If you have long ingredients, how would you present them on a round plate without cutting them?
4. Garnish: The finishing touch
Give your long veggie a shoulder to lean on instead of letting a bunch of snap peas lie flat and crisscrossed; use your protein or starch as a sturdy prop. They stand up straight and look crisp, without you having to cut them shorter.
- Quantity
The biggest mistake people make is dumping a ton of parsley on everything. A small, neat microgreens or a deliberate sprinkle of finely chopped herbs is far more impactful than a messy pile.
- Texture
A great plate gives your mouth a workout. You need that contrast between something soft and something crisp. If everything is the same consistency, the dish falls flat.
- Color
A dish that is all one shade of beige or brown just doesn’t look as appetizing. This is where those tiny edible flowers or a finely chopped red pepper can be placed strategically to provide necessary spots of intense color.
5. The concept: What’s the story here
You need to ask yourself one big question: What is the single story this dish is trying to tell?
You can’t just say, ‘The chef designed this just because.’ To make the dish meaningful, because marketing statistics show that the most effective approach is to focus on the customers and their experience.
Every plate should communicate something, whether it’s inspired by a memory, a season, a place, a culture, or an emotion.
Here are a few story concepts you could use:
- Regional
The plating could replicate the landscape or culture the dish comes from. For example: Arranging elements to look like a river or a mountain scene from a certain country.
- Historical
This concept focuses on visual storytelling through time. Use rustic, old-world food plating techniques such as minimal styling, darker plateware, or medieval-style arrangement to reflect a historical moment or culinary heritage.
- Minimalistic
This concept embraces simplicity and restraint. Every element must have a purpose. It is about what you leave off as much as what you put on. The negative space is perfect for this concept with just two or three elements, each precisely arranged.
- Nature-inspired
The food plating techniques for this should mimic natural environments such as forests, oceans, gardens, or deserts. This style often feels organic and flowing.

What are the different types of food plating techniques?
1. Classic plating
The classic plating definition refers to a traditional food presentation style often called the “clock method,” because everything has its place.
Your main (the star) goes from 3 to 8 o’clock. Your starch is up at 9 (or 11), and your vegetables are right where the sun shines, at 2 (or 1). It’s neat, balanced, and ensures you get a little bit of everything in a perfectly arranged bite.
2. Linear plating
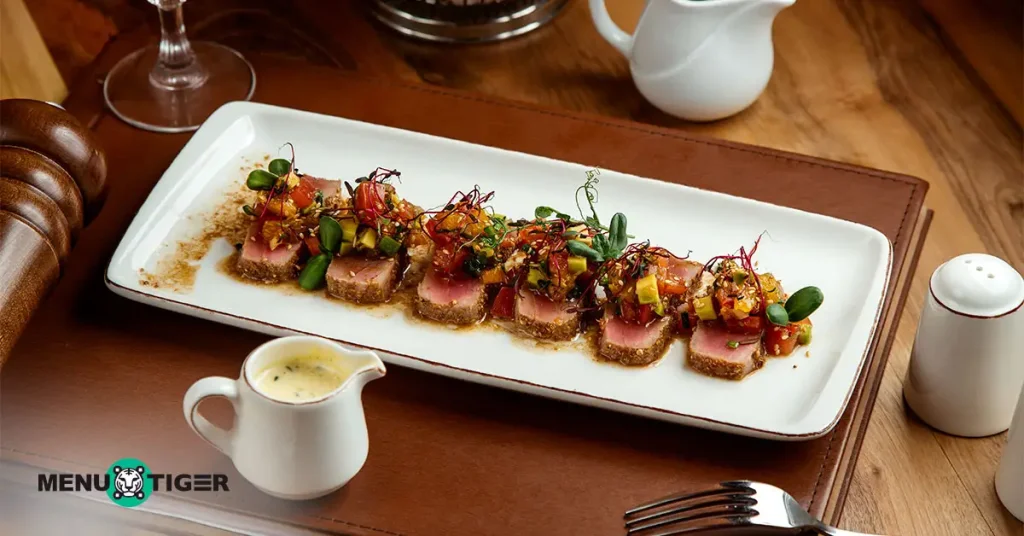
This arrangement is best suited for rectangular or elongated plates. The food is arranged low and long, encouraging the diner’s eye to travel horizontally across the plate to appreciate a series of ingredients or a tasting progression.
3. Nature-inspired plating
It is a plating food techniques that aims to mimic organic aesthetics and natural scenes, like a garden, a river, or a forest floor, right on the plate. Unlike highly structured or geometric styles, this method embraces free-form or asymmetrical arrangements.
4. Stacking plating
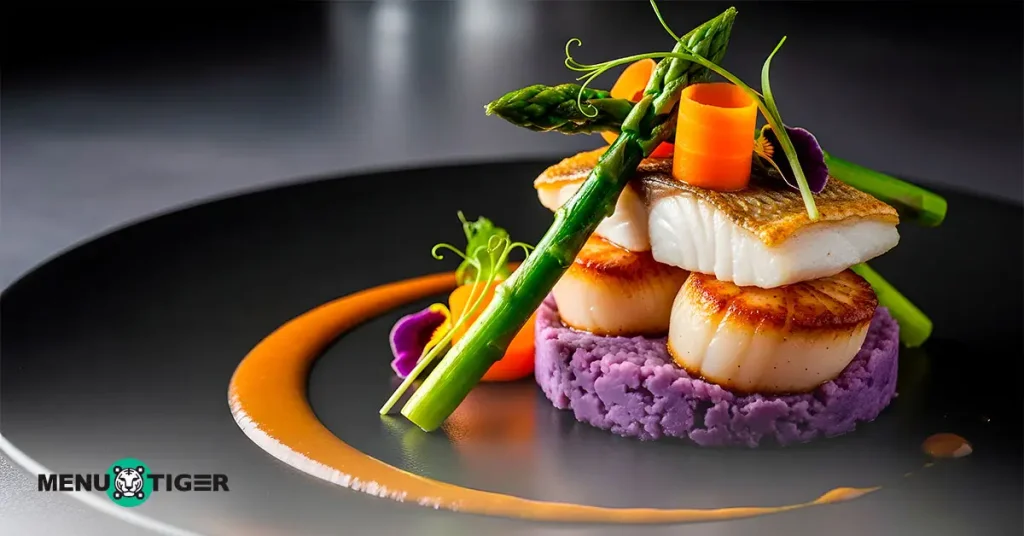
Flat food is boring food. Use a layer of starch (like mashed potatoes or puree) as a solid base, then stack your protein on top of it. You can also lean elements (like crispy vegetable chips or asparagus spears) against the main protein to give the plate a three-dimensional effect.
5. Asymmetrical plating
The asymmetrical plating method involves arranging the components of a dish off-center and unevenly on the plate, creating a visually dynamic and modern presentation.
6. Minimalist plating
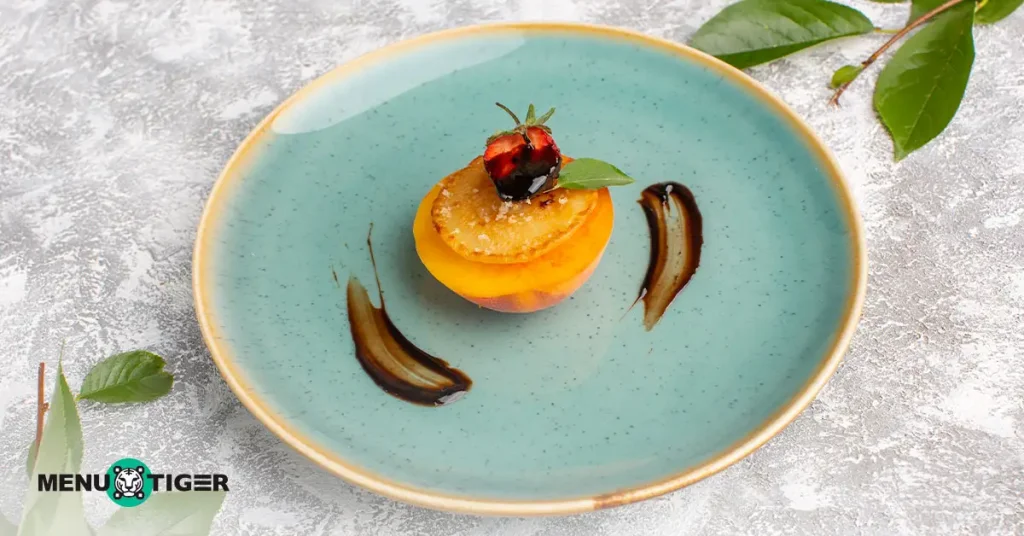
This method is more about giving more by being less. The focus is placed entirely on the quality, precision, and visual appeal of one or two main ingredients, like a perfectly seared steak or a piece of fish.
7. Freeform plating
From the word free itself, unlike other methods, there are no fixed rules. It treats the plate as a blank space, allowing the chef to break away from traditional rules to create a visually dynamic and abstract arrangement.
8. Deconstructed plating
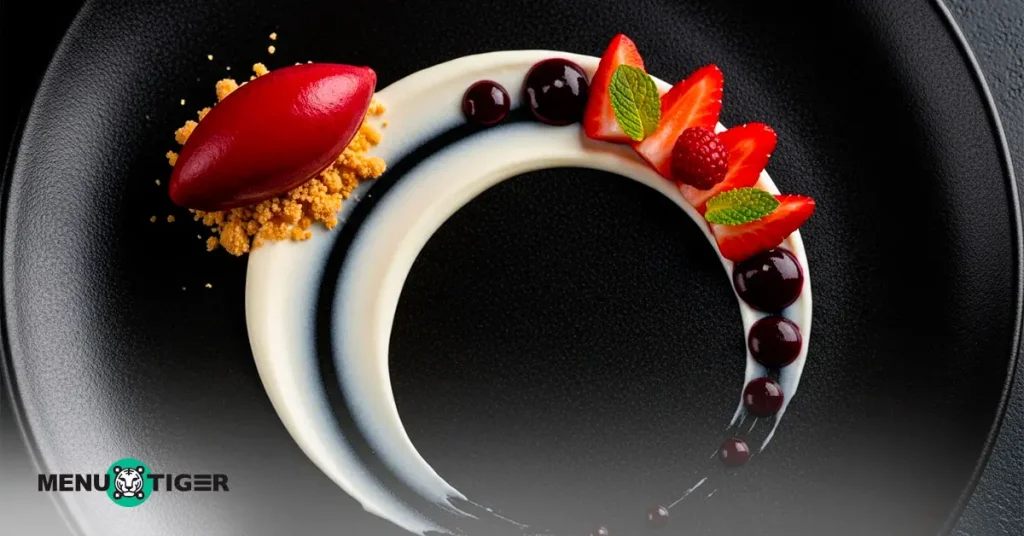
The deconstructed plating method is a modern and experimental culinary technique that breaks down a classic or well-known dish into its core ingredients and presents them individually on the plate, rather than serving the dish fully assembled.
9. Monochromatic plating
Monochromatic plating is basically the opposite of the “eat the rainbow” idea. It’s when a chef chooses one main color (or one shade) and builds the entire dish.
The reason chefs do this, that a dish that lacks bright color contrast feels immediately more subdued and conveys a sense of calm.
10. Circular plating
Basically, the food in this technique is arranged in a circular motion. Instead of just plopping food in the center, you’re actually using the round shape of the plate as a guide for your design.
Essential tool for precision plating and presentation
1. Sauce application tools
Applying a sauce is just as hard as putting a needle through a pinhole. The secret to those elegant sauce designs isn’t just skill; it’s using the right instruments that give you control over every single drop.
- Squeeze bottles. These are your best pens because they let you draw thin lines, neat circles, and perfect little dots of sauce.
- Saucing spoons. Shallow, flat spoons are specifically designed to make that beautiful, clean “swoosh” or “swipe” across the plate. Remember, these are definitely not for eating.
- Brushes. Small brushes are used to gently paint subtle layers of oil or a light glaze onto the plate, creating a soft wash of color.
- Palette knife. A palette knife works beautifully for spreading purees or sauce bases smoothly and evenly, ensuring your foundation layer is clean and structured.
2. Garnish placement tools
If sauce application is like threading a needle, garnish placement is like microsurgery. It ensures those tiny, vibrant elements land exactly where they should. So you need tools that allow you to place the microgreens on the plate without ruining the rest of the arrangement.
- Plating tweezers. This is essential for picking up and carefully placing those tiny items like microgreens, caviar, or delicate herb leaves without crushing them.
- Tongs. These are larger than tweezers, making them the right choice for handling slightly bigger but still delicate garnishes or gently arranging sliced vegetables.
3. Cleaning and finishing tools
In a presentation, a plate should contain only what is essential to the dish. If something is unnecessary, remove it.
The difference between a home-cooked meal and a professional presentation often comes down to this meticulous final cleaning, ensuring no stray drips, smears, or fingerprints distract from the art you created to offer an experiential dining that is tidy.
- Paper towels / damp cloths: The essential final step. Used to wipe the plate’s rim clean in one motion, removing all fingerprints and sauce smears.
- Q-tips: This is the perfect tool for cleaning up tiny mistakes in tight spots, like sauce that has crept into a corner or around a small component.
- Small brush: A small brush is used to dust off dry crumbs, stray spices, or fine debris that should not be on the clean plate.
- Squeegee: You can use a squeegee to quickly scrape away larger sauce mistakes or clear an area if you need to redo a section of the plate entirely.
4. Shaping and molding tools
These tools are especially useful if you’re using the stacking method or trying to imitate an object. It’s like building a sandcastle at the beach. It’s fun, but you don’t want it to come out misaligned or unstable.
- Ring molds: Simple metal rings are used to create perfectly round, neat stacks of rice, tartare, or potatoes.
- Food molds: Any geometric mold (squares, triangles, etc.) is used to shape soft foods for stacking or structure
- Melon baller: This creates perfectly round scoops of soft ingredients like butter, soft cheese, or melon for a consistent, elegant look.
- Cutters: Use this tool to punch out perfect geometric shapes (circles, squares) from things like vegetables, bread, or pastry dough.
5. Finishing touch tools
The last few seconds before a plate leaves the kitchen are crucial. Finishing touches bring everything together, from a final glint of oil to a delicate dusting of spice.
- Oil droppers: This precision tool allows chefs to apply tiny drops of high-quality oil, adding a final glint of shine and a subtle boost of flavor just before serving.
- Microplane: Designed for fine grating, it produces ultra-light bits of cheese, citrus zest, or spices that bring fresh aroma and an elegant finishing touch to the dish.
- Strainer: This small sieve ensures even distribution of powdered sugar, cocoa, or dry spices, resulting in a clean, professional finish.
- Spray bottles: Often used for misting light vinaigrettes or aromatic infusions, this tool delivers a gentle burst of flavor and scent just as the plates head to the table.
The role of restaurant technology in food presentation
Don’t overlook the vital role the restaurant order system plays in every phase of meal preparation. With all the digital tools available today, it’s smart to be strategic and find the best way to put them to use.
Here are the list of technologies and their role in presentation:
1. Digital menu
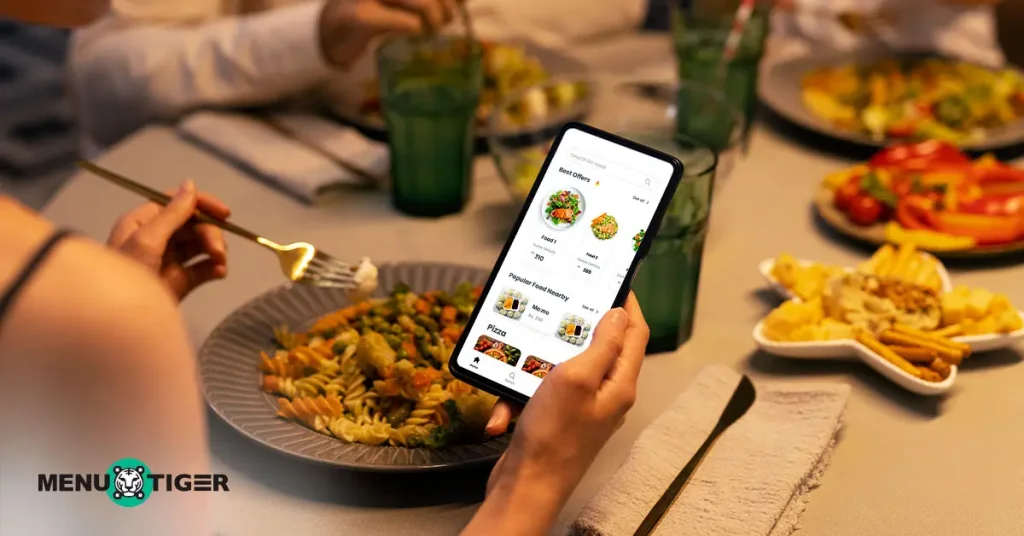
The digital menu serves as a medium for presentation. It features high-resolution photos that give diners a preview of the dish’s final, beautifully presented form. It’s essentially a promise to the customer that their plate will look just as good.
2. Kitchen display system
The reason girls often take longer to get ready is that they want to look beyond just presentable. The same idea applies to plating techniques for food;, if you want something special, it takes time to prepare.
The challenge in a restaurant is balancing that need for artistry with the fast pace of service.
A calm, organized plating station allows the chef to dedicate their full focus to the final, delicate stages of plating: executing the perfect sauce swipe with the spoon, using the tweezers for the microgreens, and wiping the rim clean.
Without the Kitchen Display System to consolidate digital menu, the pressure to move quickly often forces the chef to rush the presentation, especially when tickets pile up and communication turns into shouting.
3. Point of sale system
A restaurant pos system can generate detailed sales reports to help staff understand what’s selling, peak times, and revenue trends. Since preparation requires having premade plates ready, the POS acts as a proactive tool that tells you what to prepare based on high demand.
4. Restaurant website
Your restaurant website is your digital storefront, and yes, it’s doing presentation work before the food even hits the plate. High-quality photos and videos of beautifully plated dishes can drive bookings and set expectations.
If your website makes people hungry, your kitchen has to rise to the occasion, ensuring every dish lives up to its online image.
5. Digital feedback tool
According to Bill Gates, your most unhappy customers are your greatest source of learning. If feedback related to “presentation” is consistently negative, management can quickly use the data to pinpoint which dishes, cooks, or shifts need better plating training. In this way, you can achieve customer satisfaction that reflects in their overall dining experience.

Let your plating speak before the flavor does!
From now on, always imagine your plate as a stage, and your dish as the star performer. Remember, the key to great presentation is this: Plating is not an afterthought; it’s a commitment.
Every time a plate leaves your station, it is a chance to tell a story through thoughtful food plating techniques and increase the perceived value of your food.
Thankfully, modern technology, including your restaurant ordering system, is here to support you by ensuring you always have the time and clarity to deliver that moment of beauty.
Now that you have the knowledge and the tools, what story will your next dish tell?
FAQs
The five basic guidelines of plating are balance, portion control, thoughtful placement, use of color, and keeping focus on the main ingredient. These elements work together to create a visually appealing and well-structured dish.
Some common plating mistakes include overcrowding the plate, which can make the dish look messy, and adding too many elements, leading to visual and flavor confusion. Others include poor portioning, either too much or too little; ignoring negative space, which can make the plate feel cluttered; and lack of visual balance, such as uneven arrangement or dull color choices.
The rule of three is a visual design principle that works well in plating. It suggests using three main elements or arranging components in groups of three to create balance, harmony, and a more dynamic presentation. This helps avoid clutter while keeping the dish interesting to look at.

