
The smart and innovative food menu QR code continues to be a sound investment for many restaurants despite the uproar from customers who frown at this software.
It initially served only as a route to a view-only, PDF version of the menu, but today, this handy tool has upgraded to a whole new level with online ordering and paying features.
Customers can browse food items, place orders, and pay or tip using their smartphones. And they can do all these by just scanning the QR code.
And from the restaurateur’s end, the QR code menu software is an advantage as it can streamline operations and improve services, especially if you are low on staffing.
So let’s dive into the world of contactless technology and boost the overall quality of your restaurant; we’ll walk you through creating and designing your interactive digital menu.
What is an interactive digital menu?
Have you ever been to a restaurant where the server hands you a sticky, grease-covered menu? That must have been a horrible and disgusting experience.

This is where the interactive digital menu comes in. It provides a contactless alternative to printed menus, making it more convenient, accessible, and hygienic for customers.
Diners only have to scan a QR code with their smartphone’s camera or a QR code scanning app to access the digital menu; it’s why it’s also known to many as a QR code menu software.
The first menu QR codes that came out only displayed a PDF version of the menu. People often had to zoom in and out on the image to see the items displayed.
But with the smart digital menu, customers can interact with the software. They can make selections and customize orders by choosing sides and add-ons.
Aside from that, they can also write special instructions regarding their dish and place orders right at their fingertips using their mobile devices.
An option to pay through an online transaction is also available, and customers can even access the digital menu tipping feature as they pay for their meals.
What’s interesting about this online restaurant tool is that it saves every customer’s transaction history in the system. And you may use this information to make sound business decisions.
MENU TIGER: Best QR code for restaurant menu software
Whether big or small, restaurants can incorporate MENU TIGER and indulge in its range of benefits, such as streamlining operations and elevating the overall dining experience.
As one of the best contactless digital menu, it offers impressive features that you can use to boost customer foot traffic, improve your bottom line, and deliver the best services—its marketing features for cross-selling and upselling.
With a good QR code for menu design displayed, you can highlight high-profit items, label new and bestseller items, and add modifiers for add-ons, sides, upgrades, and steak doneness.
Customers can customize their orders, which will likely increase their total order value as they add more items to go along with their current purchases.
This software is also highly accessible as it works on devices of varying operating systems and models. You can guarantee that your customers won’t have scanning difficulties, regardless of their device.
Moreover, it has several integrations to help you run operations smoothly. These include Canva, Zapier, and printer integration for your restaurant menu.
The system also has mobile payment integration with Stripe, PayPal, Apple Pay, and Google Pay for contactless payments.
Unlike printed paper menus, you don’t need to spend money every time you update your menu content. You can modify item details on the backend; changes will appear directly on the customer’s phone screens.
Overall, MENU TIGER is the best QR code for food menu platform and a helpful tool for all food service businesses. It’s reliable, cost-efficient, and functional.

15 easy steps in creating a food QR code with MENU TIGER
Switching to a smart QR menu software is a huge step, so you must be sure you choose the right software and do it properly. We know how hard that is, so we’ll help you.
We’ve prepared a 15-step detailed guide to show how you can quickly build your interactive QR code restaurant menu. Simply follow the steps below:
1. Go to MENU TIGER and create an account
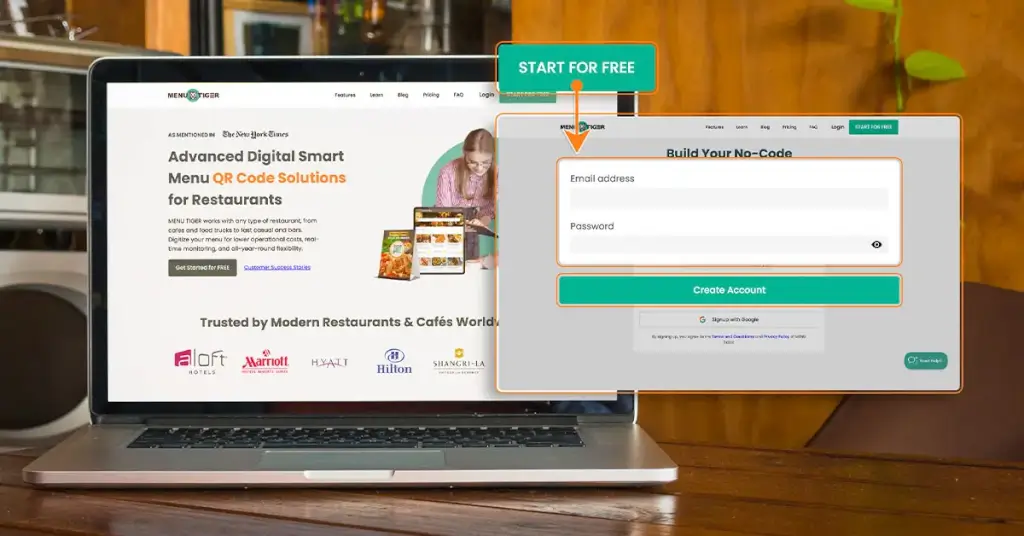
You must set up your MENU TIGER account before creating your QR code-powered smart menu. Choose from any of our affordable plans.
If you’re not yet ready for a paid subscription, you can sign up for our freemium version to create a food QR code for free. And if you enjoy it, you can upgrade anytime for more features.
2. Curate your menu
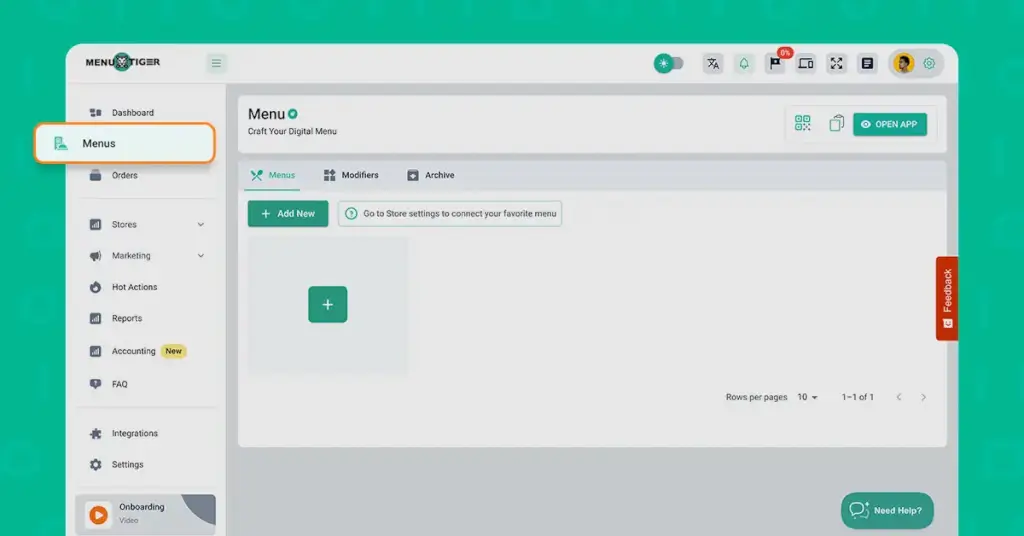
Choose how you want to create a restaurant menu. You have three options for this:
- Import your menu into Excel
- Start with a Blank state
- Create a sample menu
3. Set up your store in the Store section
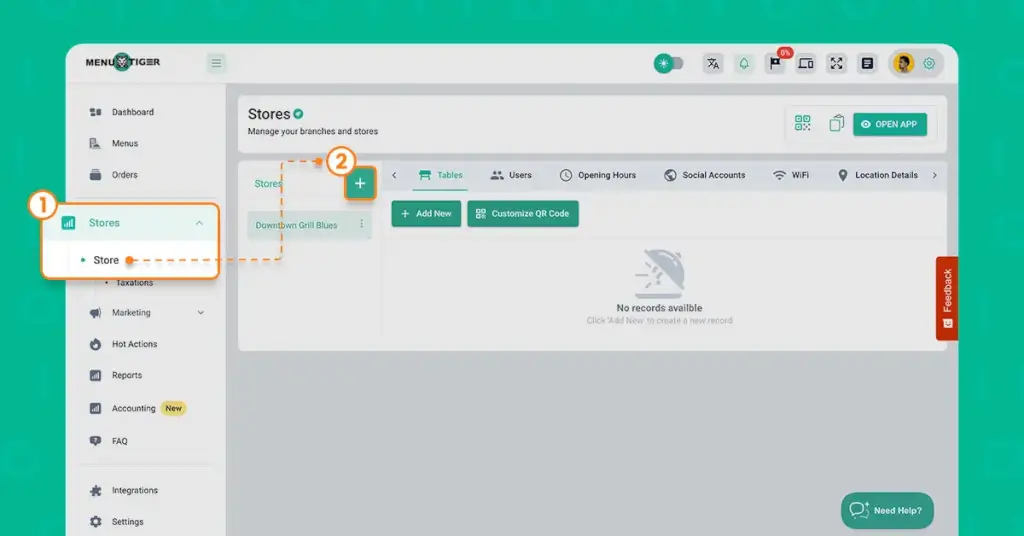
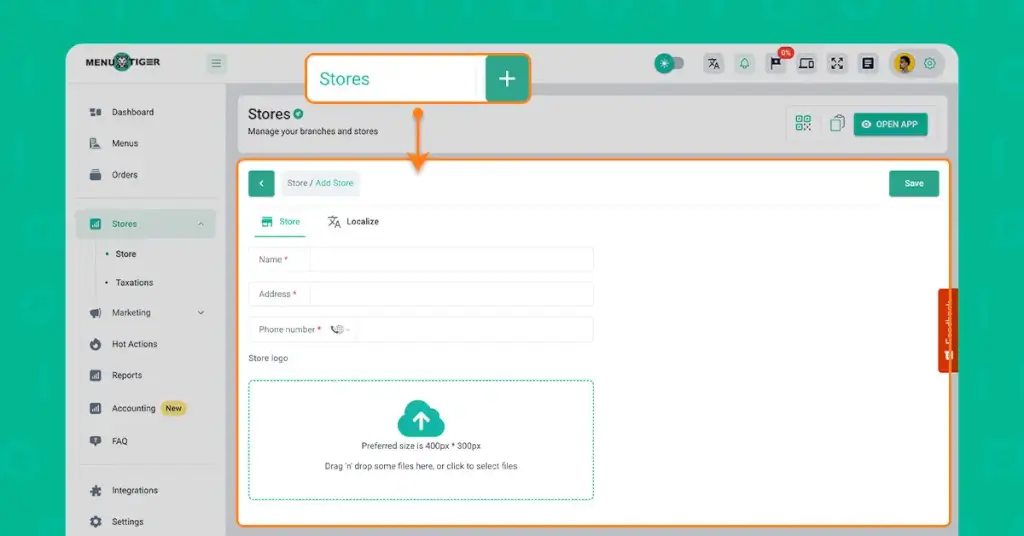
To create a store, hit the New button and fill out the required information, such as name, address, and phone number. You may also add your store logo.
4. Set the table quantity and customize the QR code menu
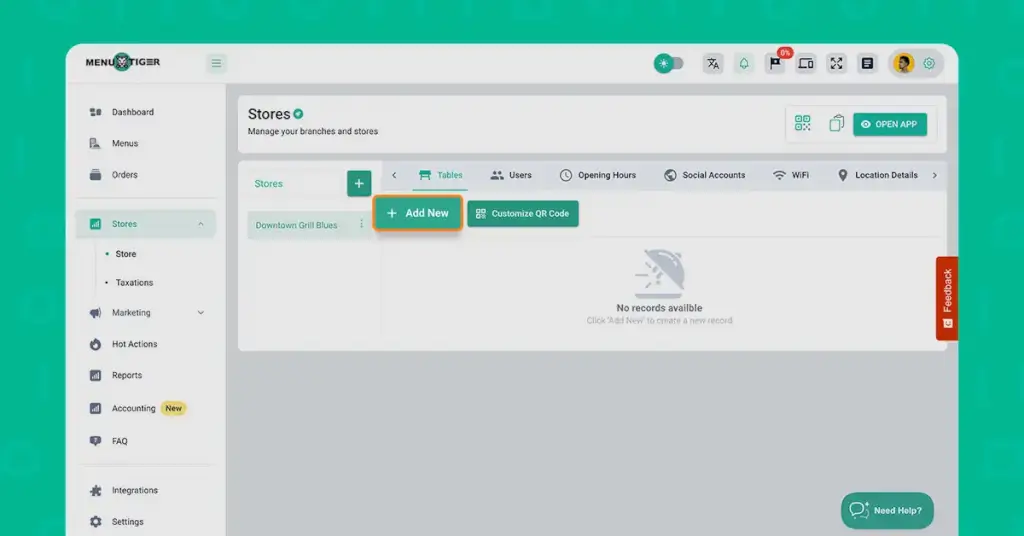
Under the Store section, click Tables, set the number of tables you prefer, and customize the QR code for each table by clicking Customize QR.
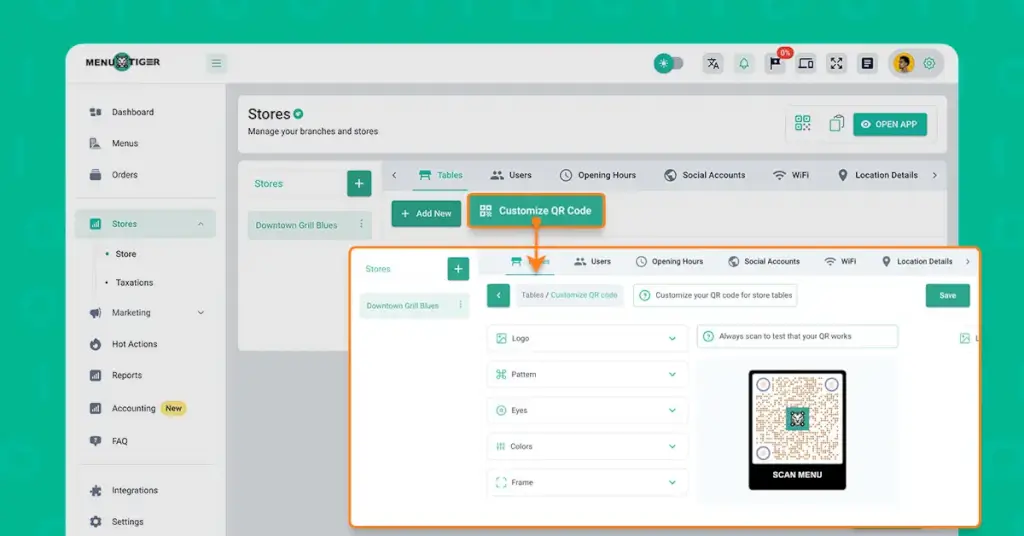
You can also make QR code menu designs by choosing from different eye and pattern styles, colors, and frames. You can also add your restaurant’s logo and a catchy CTA like “Scan to Order.”
5. Add team members to the account

Proceed to Users and hit the Add button to add a co-admin and sub-user to the account.
After that, fill out the required information that is asked and hit the Add button at the bottom.
6. Set your restaurant’s Opening Hours
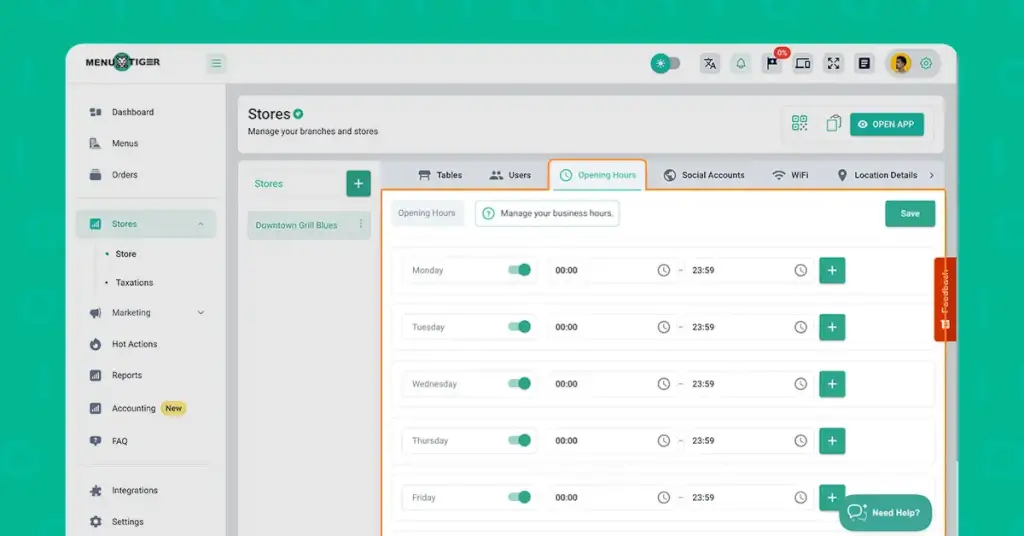
Click Opening hours and set the day and time when your store is available. Remember to save your changes by hitting the Save button.
7. Add your social media accounts
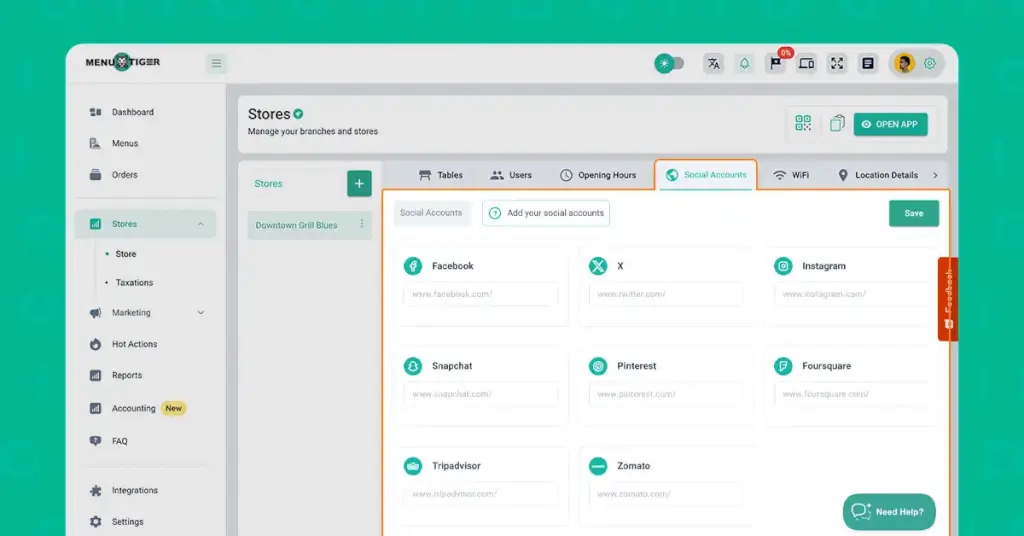
Click Social Account and link all your social media accounts so diners can follow you as they browse your digital menu.
MENU TIGER lets you link your Facebook, Instagram, Twitter, Foursquare, Snapchat, Tripadvisor, and Zomato accounts.
Once you’ve added them, click the Save button in the bottom right corner.
8. Generate a WiFi QR code

The WiFi QR code is a unique solution that provides instant WiFi access to scanners. This innovation lets diners quickly connect to the Internet without asking for passwords.
In the WiFi section, click the+Wi-Fi QR button to create a WiFi QR code. Fill out the information and make sure they’re all correct. Once done, click the Generate button.
9. Enable/Disable takeaway and dine-in ordering
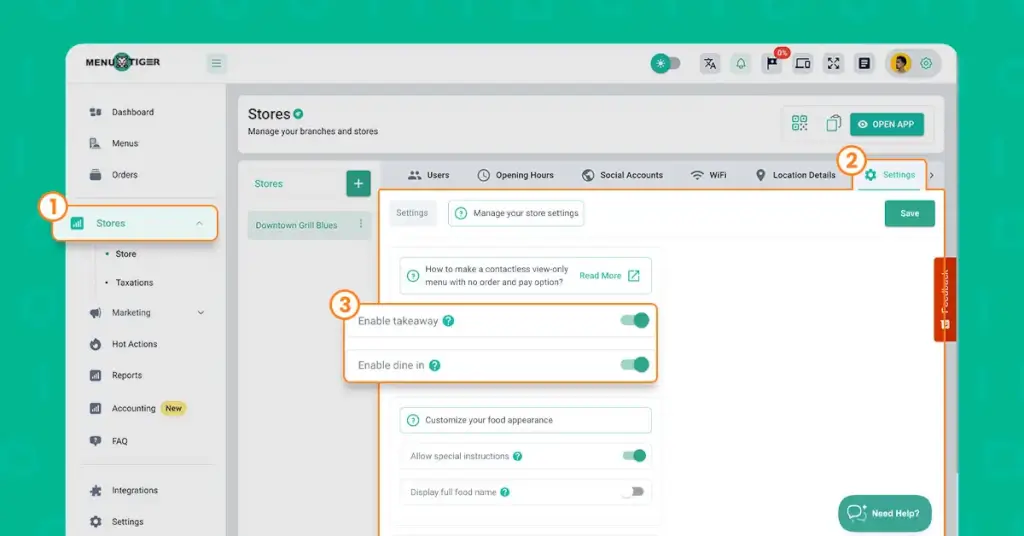
Under Ordering options, you can enable or disable takeaway and dine-in ordering. Remember to save updates by tapping the Save button.
Note: If you disable the takeout option, your website menu will appear as a view-only menu to customers; thus, customers cannot place an order on the website.
10. Proceed to the Menu section
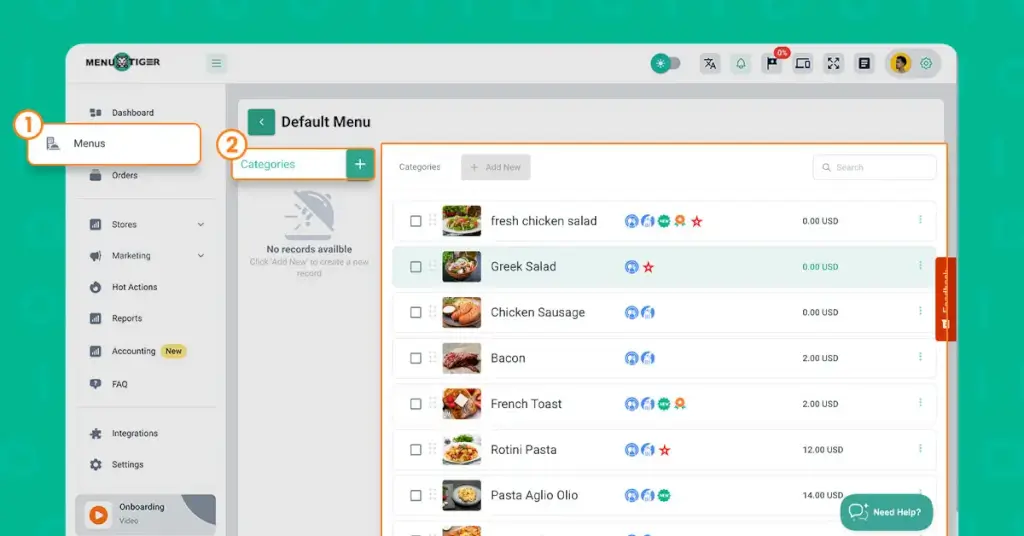
On the left tab, click Menu and add new food categories to start customizing your menu. Fill out the required information, such as the Store where you are offering it, the Name of the category, Description, Modifier groups, and Tax categories.
To save the details you input, hit the Add button.
Note: Bulk import is also available. You may import an Excel file of your menu categories and food list.
11. Add items to each food category in your QR code menu
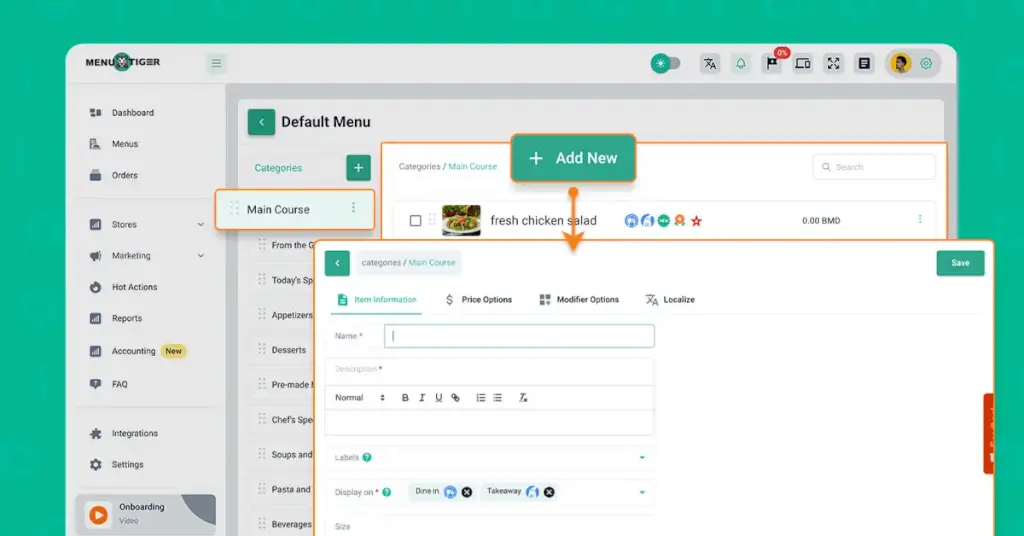
Once you’re through creating a food category, add food lists and click the Add button. Fill out the following information and remember to hit the Add button once settled.
Fill-out the following information and remember to hit the Add button once settled.
12. Add modifier groups
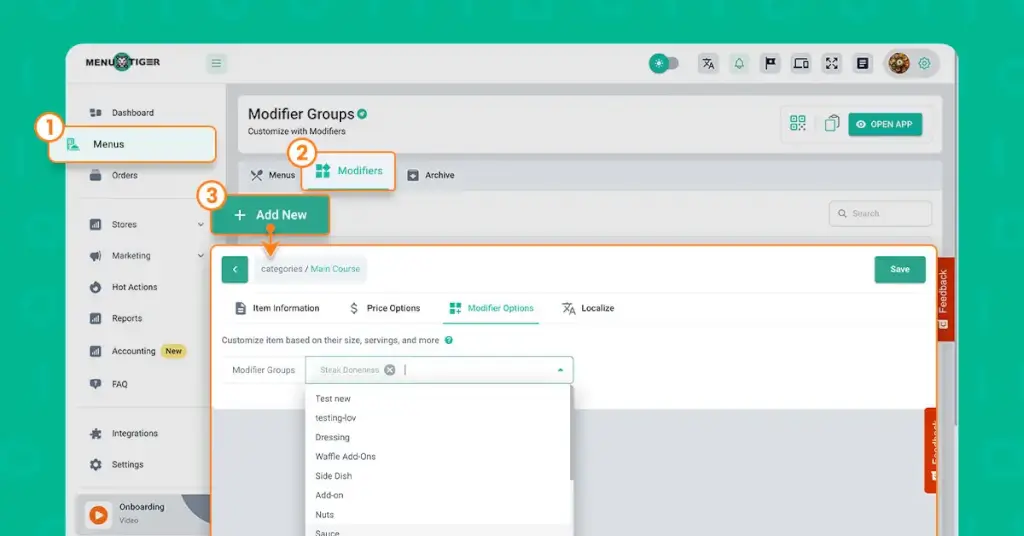
Proceed to the modifiers subsection. Click the Add button to add a modifier group and complete the necessary details. Click Save once finished.
13. Customize the custom-built restaurant website

Click the Website panel from the left tab and proceed to the Hero Section. Enable the button link and choose whether it will redirect to your restaurant’s Website menu or Custom URL. Text localization is also available.
Proceed to the About Section and click the Enable button. Add an image and your restaurant’s story. You may also localize it in different chosen languages.
After that, you must enable the Featured Food section, then add the heading and description. Localization in different languages is a provided option.
Enable the Why Choose Us Section to share with the customers the benefits they’ll experience dining at your restaurant. You may also highlight exclusive perks that make your restaurant unique.
The Newsletter section prompts customers to sign up to keep updated with current news and events. Just like other sections, localization in multiple languages is also available.
After that, select Fonts and Colors that match your brand’s theme.
14. See the Integrations
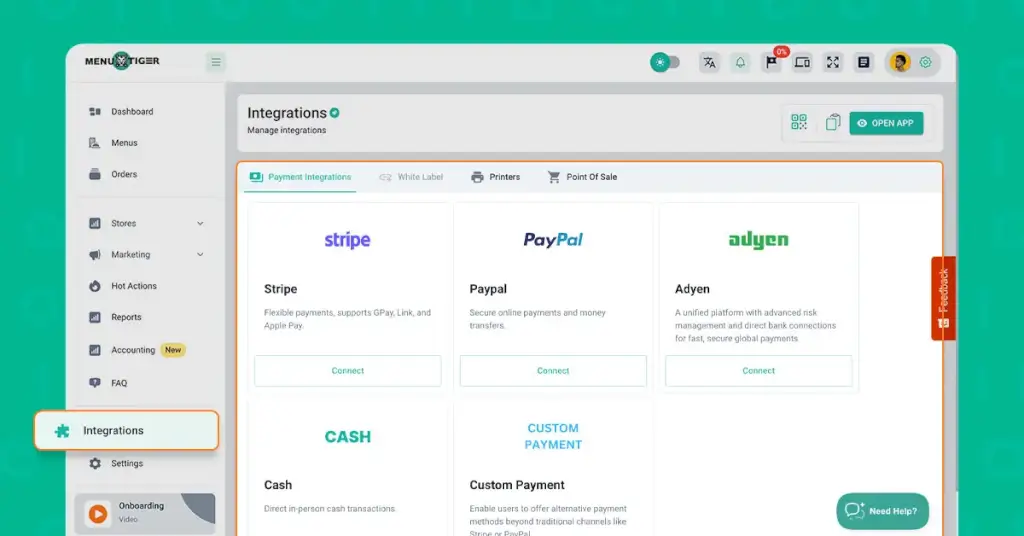
When choosing the best QR code for restaurant menu, you must also determine its integrations to have a more seamless experience. And MENU TIGER has these for your convenience.
Select Integrations from the left tab. Under Payments, set up Stripe payment integrations and enable PayPal.
Under White Label, customize your domain by clicking the Add button. Provide the domain name, choose a validation method, and tap the Submit button.
Proceed to Printers and choose a printer server application to download—either for Mac or Windows. You can add the printer feature to your current plan for only 20 USD per month.
15. Settings
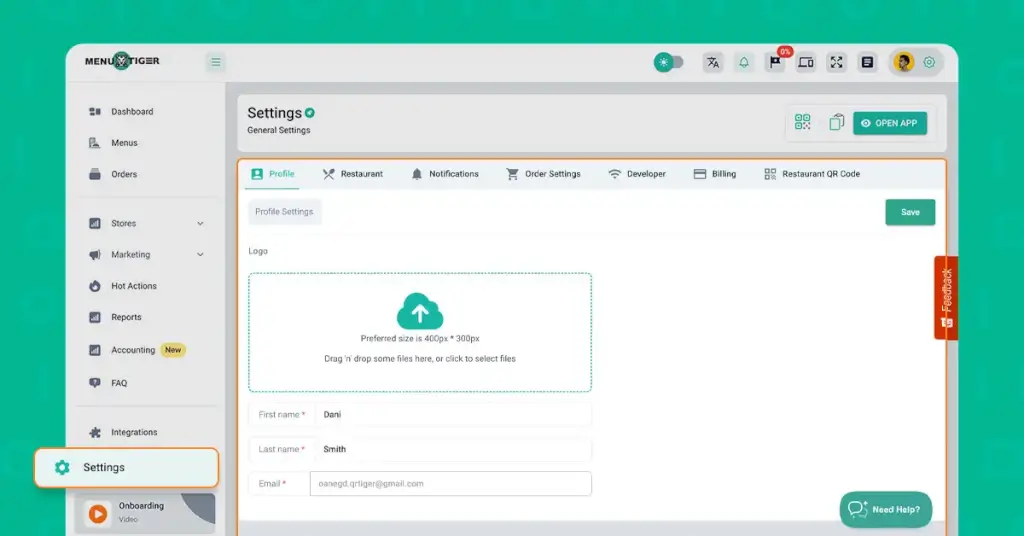
Lastly, go to Settings and proceed to Profile. Upload your store’s logo, then add your first name, last name, and email.
In the Restaurant section, provide the information asked, such as the restaurant name, address, contact email, and contact number.
Choose restaurant languages, restaurant default language, and currency. After that, remember to hit Save.
Enable Notifications, select your preferred sound or audio clip, and click Save. In the Order settings, enable Cancel Order and click Save.
5 Best practices for creating a scannable restaurant QR code
Convenience is the main point of replacing print menus with QR codes. Therefore, you must guarantee your QR code is easily scannable to avoid frustrating your customers. To ensure that diners won’t have any problems with scanning the QR code, follow these tips:
1. Customize, but keep it simple
Black-and-white QR codes are old-school. Customize your restaurant menu QR codes to make them more attractive and scan-worthy.
Choose your preferred color palette, eye style, and frame design, then add a call-to-action and your brand logo. It can help maintain consistent branding and make the QR code more visually appealing to the users.
But one thing you must never forget when you create a QR code is the simplicity of the code’s overall design. Customizing is cool, but remember not to go overboard with designs.
2. Ensure good contrast
Color QR codes work better for your restaurant since they are more attractive. You can use your brand’s colors so that the codes match your branding.
But you must carefully choose your QR code’s colors because these can affect efficiency. Use a dark color for your QR code’s pattern or foreground and a light one for its background.
Color contrast is the key to the QR code’s readability. This explains why QR codes are traditionally black and white
3. Guarantee proper sizing and placement
Your QR code won’t work if people don’t scan it, so you must place it in spots where it’s easily noticeable. When you create a QR code for your restaurant, you must use the appropriate size to ensure people will see them.
The ideal spot to place your QR code at your restaurant is on the tabletop. You may also hang it on the walls or the front door; just make sure it’s big enough to be seen.
4. Provide a clear call to action
Adding a clear and concise call to action to your paperless menu QR code encourages customers to scan it.
When designing a restaurant QR menu, include statements like “Scan for Menu” or “Scan to View Our Menu.” These tell people what to expect once they scan the code.
Including a compelling call to action on the QR code maximizes response and engagement.
5. Always do a test scan
Before deploying the QR codes, test the QR code with different devices and QR code scanning apps like the QR TIGER scanner, which also functions as a generator for basic QR codes.
You must scan the QR code at different distances, lighting conditions, and angles to ensure it’s scannable under various conditions.
Take note of the issues encountered while testing the code’s readability and make necessary adjustments; once done, repeat the testing process.

Create a QR code-powered food menu using MENU TIGER
Given its remarkable impact on the food industry, a food menu QR code will make a difference in your day-to-day operations.
A QR code for menu offers innovative solutions that revolutionize the dining experience–from giving up-to-date offerings to enhancing customer convenience.
This can also boost operational efficiency, providing extra help for customers and workers. So if you want to experience its benefits, invest in interactive QR code menu software today.
Sign up with MENU TIGER’s Freemium plan or start a 14-day free trial with their affordable Premium plan—no credit card needed.